
[vc_row][vc_column][vc_column_text css=””]
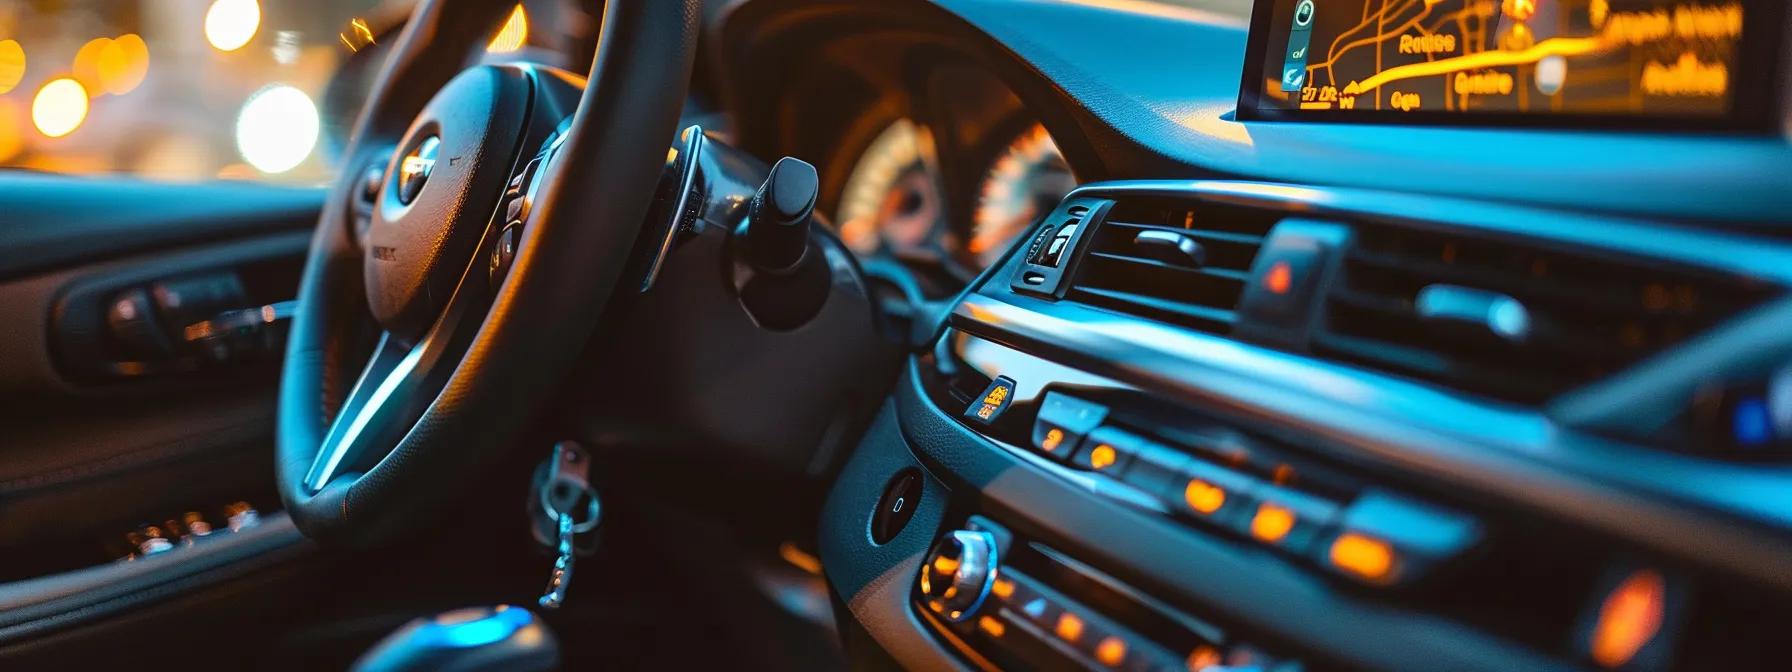
When it comes to starting your vehicle, are you team “starter button” or team “traditional key”? Both options have supporters, but which one is really better for you? In this post, we’ll break down the mechanisms of starter buttons and traditional keys, discussing their advantages and disadvantages. By understanding these points, you’ll be able to make an informed choice that fits your needs, whether you’re considering an anti-vandal switch for security or simply pondering a more convenient way to start your vehicle. Let’s dive in and contact Langir for your button needs!
Key Takeaways
- Starter buttons simplify vehicle ignition with a quick press, enhancing convenience for users
- Traditional keys offer reliability and familiarity, making them a trusted choice for many drivers
- Cold weather can affect starter button performance, unlike mechanical traditional keys
- Advanced security features in starter buttons help reduce the risk of vehicle theft
- Choosing between ignition methods depends on personal preferences, vehicle models, and daily routines
Understanding the Mechanism of the Starter Button and Traditional Key

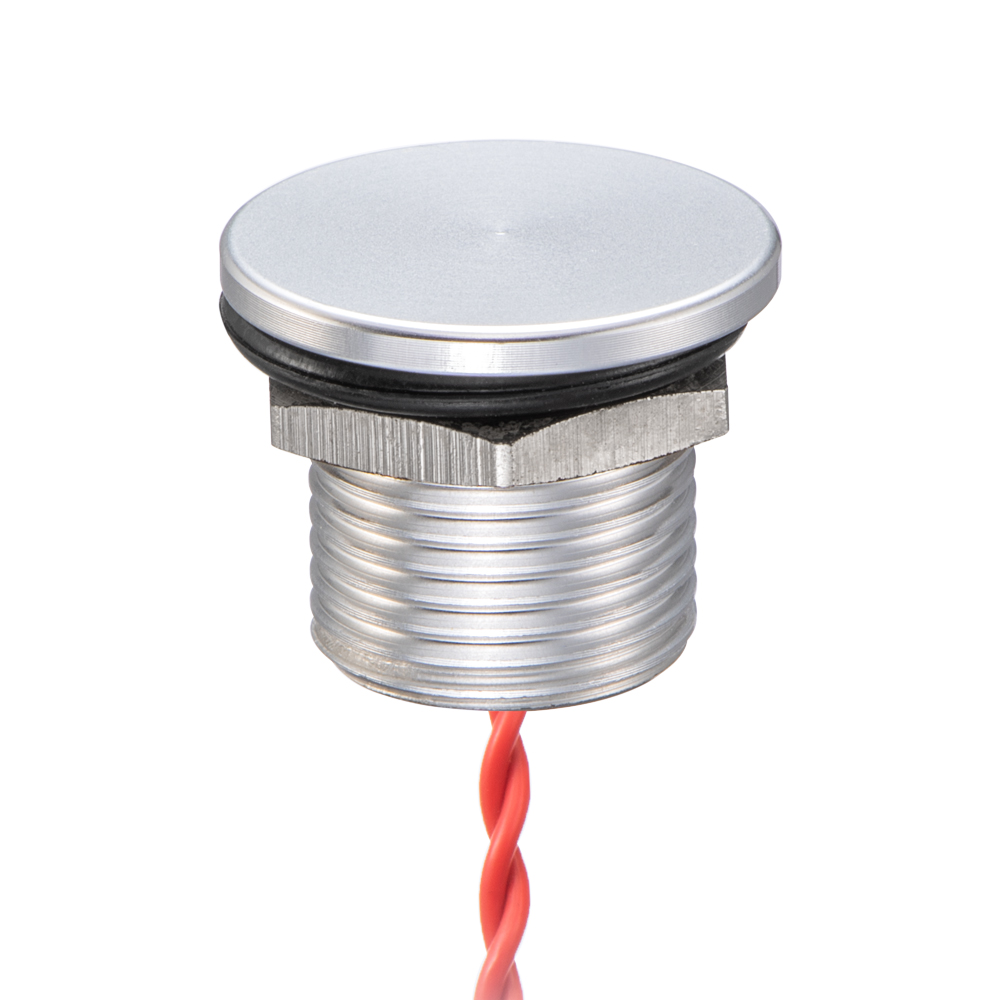
The starter button operates by sending signals through an electrical connector, or an anti-vandal switch to engage the solenoid, which activates the engine. In contrast, a traditional key turns mechanical components, connecting to sensors and relays to start the vehicle. Understanding these mechanisms highlights key differences, especially as modern automotive technology increasingly prioritizes efficiency and ease of use, transforming the role of the steering wheel and ignition.
How a Starter Button Functions
The starter button functions by closing a circuit via electrical wiring, which sends an activation signal to the engine’s solenoid. This process eliminates the need for a key and simplifies starting your vehicle. Once you press the button, the gear within the ignition system engages, allowing signals to flow through the necessary wires and activate the engine, provided the parking brake is engaged and the vehicle is in the correct gear.
The Operating Process of a Traditional Key
The operating process of a traditional key involves a few steps that activate the vehicle’s electronics for starting. When you insert the key into the ignition and turn it, the key acts as a form of authentication, connecting various components like relays and sensors to allow the engine to start. This method works well for many vehicles, including vans, because it provides a simple and reliable way to engage the ignition system:
Key Differences in Mechanisms
The mechanisms behind starter buttons and traditional keys showcase distinct approaches to vehicle ignition. While the starter button simplifies the process by engaging directly with the engine’s solenoid through an electrical signal, a traditional key acts more like a door handle, connecting various components including relays and sensors before starting the engine. For enthusiasts of brands like Acura, this difference can affect not only convenience but also the overall car experience, as safety features like a kill switch are built into both systems, impacting user interaction with the vehicle.
Role of Electrical Systems in Both Options
Electrical systems play a crucial role in both starter buttons and traditional keys. With a starter button, the ignition switch seamlessly engages the engine by sending signals, making it easier for you to start your vehicle. In contrast, the traditional key uses a keychain attachment that connects various components, from relays to sensors, which enhances physical security while ensuring the transmission is in the correct position. Understanding these systems helps you appreciate the balance between convenience and security in your vehicle’s start mechanism.
Overview of Modern Automotive Technology
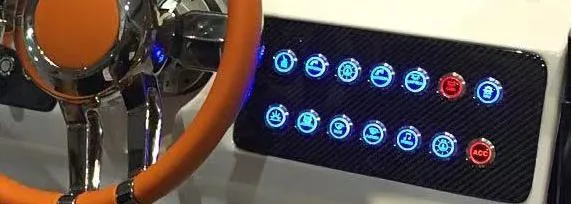
Modern automotive technology combines convenience and security, transforming how you interact with your vehicle. Starter buttons and smart keys have replaced traditional keys, utilizing sophisticated signals to engage the engine with a simple touch. Features like plug and play systems ensure that even when towing or connecting accessories, the process remains seamless and efficient, allowing for an enjoyable driving experience.
Advantages of Using a Starter Button

Using a starter button offers several benefits over traditional key ignition systems. You gain enhanced security features that help prevent theft, making it a safer choice for vehicles like the Nissan Altima. Enjoy convenience and ease of use with just a press of a button, as well as aesthetic appeal that modernizes vehicle design. Many starter buttons also integrate seamlessly with keyless entry systems and present the latest technological innovations, aligning with advanced steering and brake functionalities.
Enhanced Security Features
Using a starter button truly enhances security features for your vehicle. Unlike traditional keys, which can be easily lost or duplicated, the starter button provides a more modern approach that often integrates with advanced ignition systems. This means you get robust security, alongside features that allow for USB connectivity and easy access to original equipment manufacturer options, giving you peace of mind while you’re on the road:
- Starter buttons reduce the risk of theft due to their complexity compared to traditional keys.
- They often come with keyless entry options, making it convenient to access your vehicle without fumbling for keys.
- Advanced systems may include features that communicate with your vehicle’s original equipment manufacturer, ensuring you get the latest safety updates.
Convenience and Ease of Use
Using a starter button brings unparalleled convenience and ease of use. You simply push a button to start your vehicle instead of fumbling around with a key in your pocket or purse. This functionality not only saves you time but also enhances your driving experience, especially in those moments when you’re juggling bags or trying to get into the car quickly:
- Quick and effortless ignition with a single press.
- Great for busy lifestyles when every second counts.
- Improves accessibility for those with limited mobility.
Aesthetic Appeal in Vehicle Design
When it comes to aesthetic appeal in vehicle design, a starter button adds a modern touch that enhances the overall look of your dashboard. Instead of a bulky key ignition, which can feel outdated, a sleek starter button contributes to a clean, streamlined appearance. This design choice not only elevates the style of your vehicle but also aligns with contemporary technology trends, appealing to those who want their cars to reflect innovation and sophistication.
Compatibility With Keyless Entry Systems
Starter buttons enhance compatibility with keyless entry systems, making it easier for you to access your vehicle without fumbling for keys. This feature allows you to simply approach your car and start it with a push of a button, streamlining your experience. For instance, if your hands are full, you can just slide into the seat and have your vehicle ready to go in seconds, alleviating some everyday stress while boosting convenience.
Technological Innovations Integrating Starter Buttons
Technological innovations have significantly improved the functionality of starter buttons, making them more appealing than traditional keys. Modern starter buttons often integrate features like smartphone connectivity, allowing you to start your vehicle remotely or receive alerts if there are any issues. With systems that support app interfaces, you can easily monitor vehicle diagnostics, enhancing safety and convenience on the go:
Advantages of Traditional Keys

Traditional keys offer simplicity and familiarity, making them easy to use for many drivers. They are known for their reliability in various conditions, ensuring you can start your vehicle when needed. Additionally, traditional keys are cost-effective to replace and require minimal dependence on electrical systems. This long-standing automotive tradition has served countless vehicles, giving you practical assurance in a trusted mechanism.
Simplicity and Familiarity in Use
When it comes to simplicity and familiarity in use, traditional keys shine. You just insert the key into the ignition and turn it—it’s straightforward and requires little thought. This reliability can be especially comforting in awkward situations, like when you’re at the grocery store, arms full of bags, and you can still start your vehicle without fussing with complicated systems.
Reliability in Varied Conditions
When it comes to reliability in varied conditions, traditional keys truly stand out. You can confidently use them in any weather, whether it’s a snowstorm or a sunny day, without worrying about a complex electrical system failing. Just insert the key and turn; it’s that simple. This straightforward approach means you can always start your vehicle, even if the battery is weak or there’s an electrical fault, providing peace of mind when you need it most.
Cost-Effectiveness in Replacement
When it comes to cost-effectiveness in replacement, traditional keys have a clear advantage over starter buttons. If you lose a key or need a replacement, it’s often a simple, affordable process that doesn’t require complex technology. This can save you time and money, especially when compared to the potential high costs of replacing a starter button system or addressing any electronic issues that may arise.
Minimal Dependence on Electrical Systems
One clear advantage of traditional keys is their minimal dependence on electrical systems. You can count on them to work whether it’s freezing outside or the sky is clear. If there’s an electrical issue in your vehicle, a simple turn of the key still gets you moving, which is a comforting thought when you’re in a rush or find yourself in an inconvenient situation.
Long-Standing Automotive Tradition
The long-standing automotive tradition of using traditional keys has offered drivers a reliable and straightforward method for starting their vehicles. Keys have been a mainstay for so long because they provide a sense of familiarity and confidence; you know exactly what to do when you need to start your car. This simplicity is particularly comforting in times when technology might fail, giving you a dependable solution without the complexities of modern systems.
Disadvantages of Starter Buttons
While starter buttons offer modern convenience, they come with some drawbacks. You should consider the potential for electrical failure, which can leave you stranded. Additionally, there’s a learning curve for new users. Repair costs can also be higher if something goes wrong, and there’s a risk of accidental use. Cold weather performance can be an issue, making it essential to weigh these factors against the benefits.
Potential for Electrical Failure
The potential for electrical failure with starter buttons is a real concern. If the electrical system malfunctions, you could find yourself unable to start your vehicle, which is frustrating and inconvenient. Unlike traditional keys, which have a straightforward mechanical function, starter buttons rely on electronic components that may fail, especially in extreme weather. This could lead to delays or even unexpected breakdowns, prompting you to weigh the reliability of conventional keys over modern options.
- Electrical systems can be tricky and may not always function as expected.
- Potential for malfunctions, especially in harsh weather conditions.
- The complex nature of electronic systems may lead to costly repairs.
Learning Curve for New Users
If you’re thinking about switching to a starter button, you might find that there’s a bit of a learning curve. Unlike the straightforward action of turning a key, a starter button can require you to remember to push it just right—especially if you’re used to the familiar feel of a traditional key. This adjustment might seem minor, but if you’re in a rush or distracted, it can leave you feeling a bit flustered, so giving yourself some time to adapt is key to fully enjoying the button’s benefits.
Higher Repair Costs in Case of Malfunction
When things go wrong with a starter button system, the repair costs can hit your wallet hard. Unlike a traditional key that simply needs replacement if lost, a malfunctioning starter button often involves diagnostics and repairs of the electrical components, which can be pricey. So, as you consider whether to choose a starter button or stick with a traditional ignition key, think about these potential costs and whether you’re ready for them if the unexpected happens.
Risks of Accidental Use
One concern with starter buttons is the risk of accidental use. It’s all too easy to bump the button while getting in or out of your vehicle, which could lead to the engine starting unexpectedly. This surprise ignition can be quite alarming, especially if you’re trying to hop in quickly with your hands full. By contrast, traditional keys require a deliberate action, which may help you avoid those awkward moments altogether.
Issues in Cold Weather Performance
Cold weather can pose challenges for starter button systems. If the temperature drops significantly, the electronic components may struggle to work properly, making it difficult for your vehicle to start. You might find yourself waiting for the system to respond or facing delays that simply don’t happen with a traditional key ignition, where the mechanical function remains unaffected by the weather:
Disadvantages of Traditional Keys

Issues like losing or damaging keys can be a real hassle, especially when you need to start your vehicle quickly. Traditional keys lack the modern features that come with starter buttons, making them feel outdated. You also have the inconvenience of manually operating the ignition, which can be a pain if your hands are full. Plus, traditional keys can be vulnerable to theft, putting your vehicle at risk. Lastly, if you have multiple vehicles, keeping track of various keys becomes a challenge, adding to everyday stress.
Issues With Losing or Damaging Keys
If you’ve ever lost a traditional key or accidentally damaged it, you know the frustration that comes with it. This inconvenience can leave you stranded or scrambling to find a way to get into your vehicle. In contrast, a starter button system removes that worry altogether, making your driving experience less stressful and more seamless. With keys, you often find yourself faced with the hassle of replacements, while with a starter button, you simply press and go when you’re ready to hit the road.
Limitations in Modern Features
Traditional keys come with clear limitations when it comes to modern automotive features. Unlike starter buttons, which offer convenient functions like keyless entry and remote start, traditional keys stick to the basic mechanics of turning the ignition. If you miss out on the latest tech advancements available in vehicles today, starting your car can feel a bit outdated and cumbersome, especially when you’re juggling groceries or trying to enter your vehicle quickly.
Inconvenience of Manual Operation
With traditional keys, you face the hassle of manual operation every time you start your vehicle. If your hands are full—say, when you’re juggling groceries or a coffee—you have to fumble around just to insert the key. This added step can be a real pain, especially when you want to jump in and go, making you appreciate the ease that a starter button brings to the table.
Vulnerability to Theft
When it comes to traditional keys, your vehicle is at a higher risk of theft since keys can easily be lost, duplicated, or stolen. Thieves often target vehicles with conventional ignition systems, as gaining access to a key can provide a straightforward path to taking your car. In contrast, starter buttons typically offer better security options, reducing the likelihood of unauthorized access and giving you peace of mind:
Challenges in Multiple Vehicle Access
When you juggle multiple vehicles, keeping track of traditional keys can lead to a real headache. You might find yourself fumbling through pockets or bags, trying to remember which key goes to which car, and let’s be honest—it’s never a fun moment when you’re already late. Without the convenience of a starter button, which gives you a smooth, hassle-free ignition process, you could waste precious time each time you need to start up one of your rides.
Making the Choice Between Starter Button and Traditional Key
When deciding between a starter button and a traditional key, it’s essential to evaluate your personal preferences and needs. Consider your vehicle type and model, as well as any cost implications and maintenance required for each option. Safety and security features are also key factors to assess, alongside emerging trends in automotive startup systems that may influence your choice moving forward.
Understanding these aspects will help you determine which ignition method aligns best with your lifestyle and vehicle requirements. Each topic will guide you through the practical insights necessary for making an informed decision.
Evaluating Personal Preferences and Needs
When choosing between a starter button and a traditional key, it’s all about what works for you. Think about your daily routine and how much convenience matters to you—if you’re never without your hands full, a starter button might feel like a game changer. On the flip side, if you appreciate reliability and keep it simple, the trusty key could feel more comfortable and familiar, especially during those busy mornings when you just need to get going without fuss.
Considering Vehicle Type and Model
When considering vehicle type and model, think about how these factors influence your ignition choice. For newer models or sporty vehicles, a starter button often fits right in with their modern design and high-tech features. On the other hand, traditional keys can be more practical for older vehicles or for drivers who prefer familiarity and reliability in their everyday car experience. It’s all about what aligns best with your driving style and vehicle’s functionality.
Analyzing Cost Implications and Maintenance
When weighing the cost implications and maintenance of starter buttons versus traditional keys, it’s important to consider what you’re getting into. Traditional keys tend to be more budget-friendly, with simple replacement options if you happen to misplace one. In contrast, starter button systems might come with higher repair costs due to their reliance on electrical components, leading to potential expenses if things go haywire. Think about how much you’re willing to invest in maintaining convenience versus sticking with reliable simplicity, especially if you’re someone who values no-nonsense practicality in their vehicle.
Assessing Safety and Security Features
When you’re considering safety and security features, the choice between a starter button and a traditional key can feel significant. The starter button often integrates advanced security measures, reducing the likelihood of theft and making it harder for someone to simply duplicate your access. While traditional keys are straightforward and reliable, they can be lost or easily copied, putting your vehicle at greater risk; you might want to weigh the convenience of smart features against the proven reliability of classic keys as you make your decision.
Future Trends in Automotive Startup Systems
As you consider starter buttons versus traditional keys, it’s worth noting that future trends in automotive startup systems point toward increasingly sophisticated features. Think of advancements like biometric systems that use fingerprint scanning for ignition or integration with smart devices for seamless connectivity. These innovations may lead to a choice where convenience and security blend, making the decision not just about preference but about keeping up with technology:
[/vc_column_text][/vc_column][/vc_row][vc_row][vc_column][vc_zigzag]
[/vc_column][/vc_row][vc_row][vc_column][vc_zigzag][/vc_column][/vc_row]


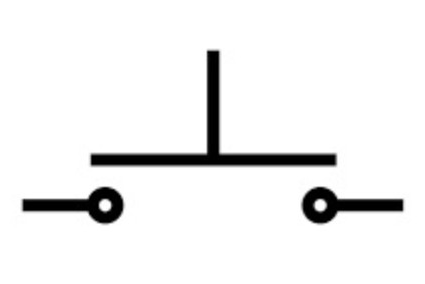
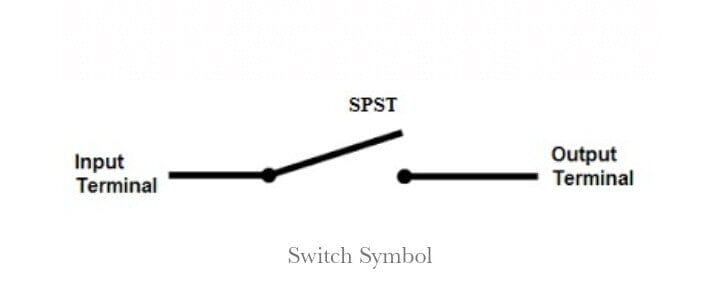 [/vc_column_text][/vc_column][/vc_row][vc_row][vc_column][vc_tta_accordion][vc_tta_section title=”Working of a Single Pole Single Throw (SPST) Switch” tab_id=”1713701918810-aaca1741-27e5″][vc_column_text css=””]
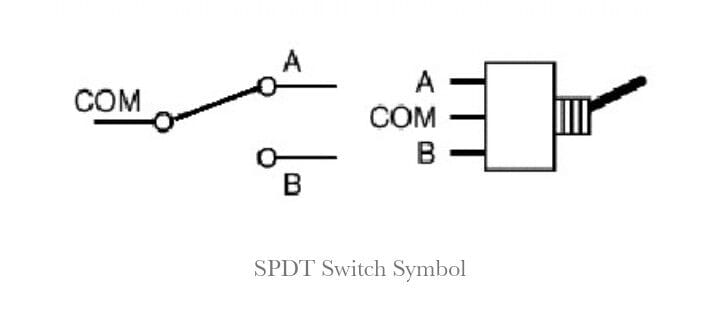 [/vc_column_text][/vc_column][/vc_row][vc_row][vc_column][vc_tta_accordion][vc_tta_section title=”Working on a SPDT Switch” tab_id=”1713702241553-6a629d90-4bf4″][vc_column_text css=””]
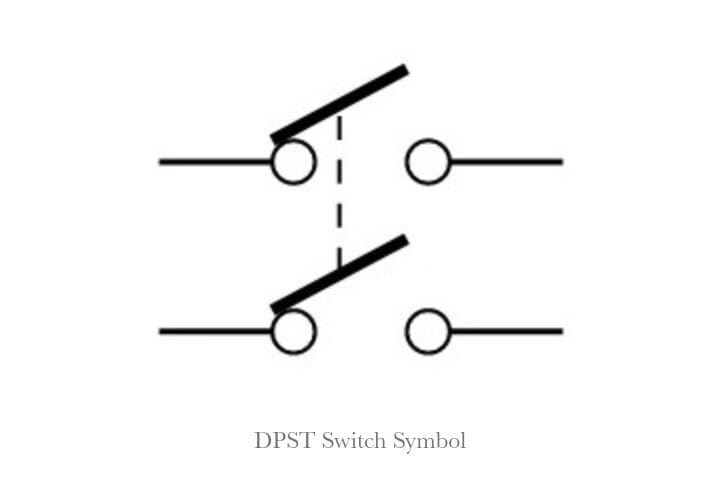 [/vc_column_text][/vc_column][/vc_row][vc_row][vc_column][vc_tta_accordion][vc_tta_section title=”Working on a DPST Switch” tab_id=”1713702480408-f0dfcbf3-8ff5″][vc_column_text css=””]
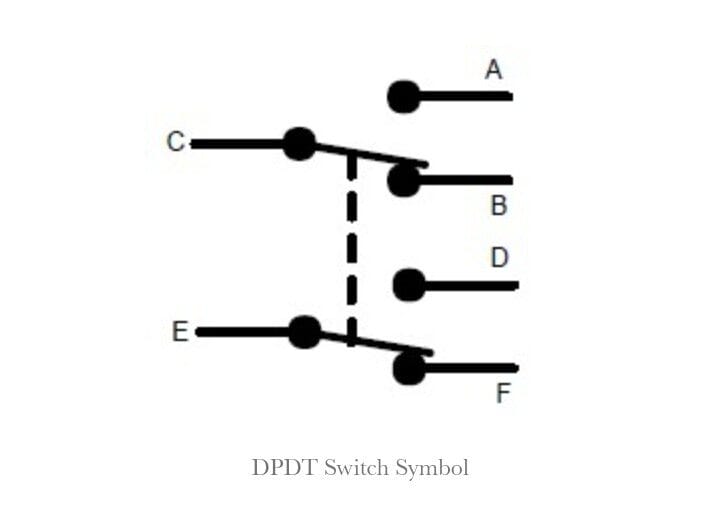 [/vc_column_text][/vc_column][/vc_row][vc_row][vc_column][vc_tta_accordion][vc_tta_section title=”Working of a DPDT Switch” tab_id=”1713702704854-5892cac1-08b5″][vc_column_text css=””]
 [/vc_column_text][/vc_column][/vc_row][vc_row][vc_column][vc_column_text css=””]
 [/vc_column_text][/vc_tta_section][vc_tta_section title=”Single Pole Double Throw Latching Switch” tab_id=”1713680423147-2025e44b-8dff”][vc_column_text css=””]
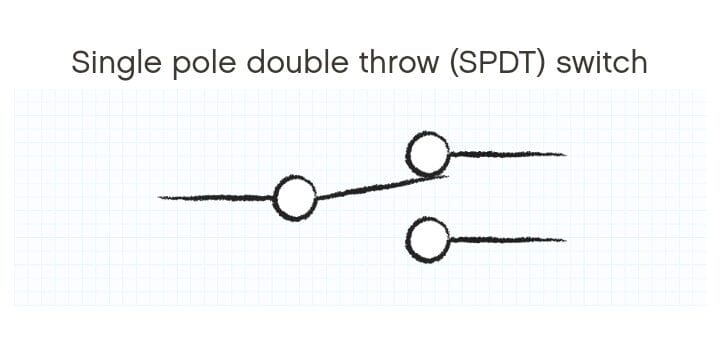 [/vc_column_text][/vc_tta_section][vc_tta_section title=”Double Pole Single Throw Latching Switch” tab_id=”1713681011236-4e4d5182-2fbc”][vc_column_text css=””]
 [/vc_column_text][/vc_tta_section][vc_tta_section title=”Double Pole Double Throw Latching Switch” tab_id=”1713681063108-3f10f8db-cf9e”][vc_column_text css=””]
 [/vc_column_text][/vc_tta_section][/vc_tta_accordion][/vc_column][/vc_row][vc_row][vc_column width=”1/3″][vc_column_text css=””]
 [/vc_column_text][/vc_column][vc_column width=”2/3″][vc_column_text css=””]
 [/vc_column_text][/vc_column][vc_column width=”2/3″][vc_column_text css=””]
 [/vc_column_text][/vc_column][vc_column width=”2/3″][vc_column_text]
 [/vc_column_text][/vc_column][vc_column width=”2/3″][vc_column_text css=””]
 [/vc_column_text][/vc_column][vc_column width=”2/3″][vc_column_text css=””]
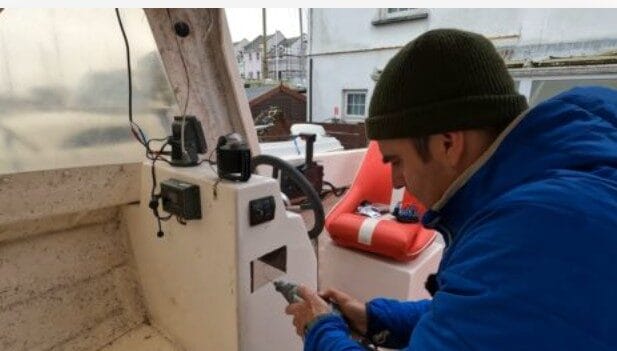 [/vc_column_text][/vc_column_inner][vc_column_inner width=”3/4″][vc_column_text]Prepare the boat for the new switch panel by cutting a space in the helm or desh exactly the size of the panel. Make sure all wires are accessible at the installation area.[/vc_column_text][/vc_column_inner][/vc_row_inner][/vc_tta_section][vc_tta_section title=”Step 2: Connect Circuit Breaker With Battery” tab_id=”1711087750695-188ea138-187b”][vc_row_inner content_placement=”middle”][vc_column_inner width=”1/4″][vc_column_text]
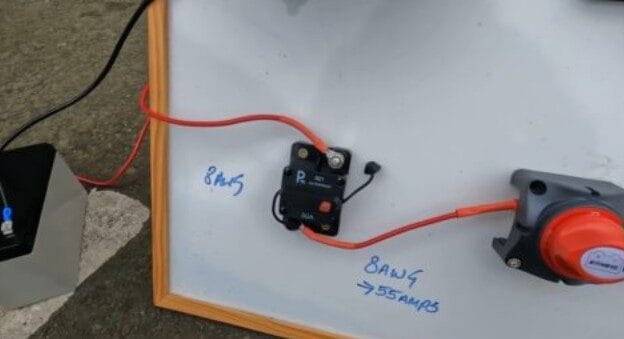 [/vc_column_text][/vc_column_inner][vc_column_inner width=”3/4″][vc_column_text]Next, connect the circuit breaker to the battery. A circuit breaker is essential to ensure your battery doesn’t get exhausted too quickly and guarantees the safety of connected wires. Simply take the wire and connect one end to the positive terminal of the battery and the other end to the circuit breaker.[/vc_column_text][/vc_column_inner][/vc_row_inner][/vc_tta_section][vc_tta_section title=”Step 3: Connect the Switch Panel and Fuse Panel to the Battery” tab_id=”1711087797655-4028a26c-ced8″][vc_row_inner content_placement=”middle”][vc_column_inner width=”1/4″][vc_column_text]
 [/vc_column_text][/vc_column_inner][vc_column_inner width=”3/4″][vc_column_text]To connect the wire to the fuse panel, start by taking a marine-grade wire. Connect one end of the wire to the other negative terminal of the battery and the second end to the opposite side of the fuse panel.
 [/vc_column_text][/vc_column_inner][vc_column_inner width=”3/4″][vc_column_text]Your switch panel is now ready to be connected to different boat accessories or components. For this, take the negative wire of the accessories and connect it to the negative terminal on the fuse panel. Simultaneously, connect the positive wire of the accessories with the positive switch panel terminal. Put the switch panel in place and you are all done![/vc_column_text][/vc_column_inner][/vc_row_inner][/vc_tta_section][/vc_tta_accordion][/vc_column][/vc_row][vc_row][vc_column][vc_column_text css=””]
 [/vc_column_text][/vc_column][vc_column width=”2/3″][vc_column_text css=””]